
Whole-house customization is rapidly becoming the gold standard. According to the National Association of Realtors, 78% of homebuyers prioritize houses with customizable features. However, most homeowners don’t understand the complete process of whole-house customization.
In this guide, we break down the entire journey into 9 actionable steps. You can transform your dream home from concept to reality with confidence and clarity using this guide!
1. Needs Assessment
This is the first step of your whole-house customization journey. In this step, you list down your needs to ensure that your house matches your lifestyle.
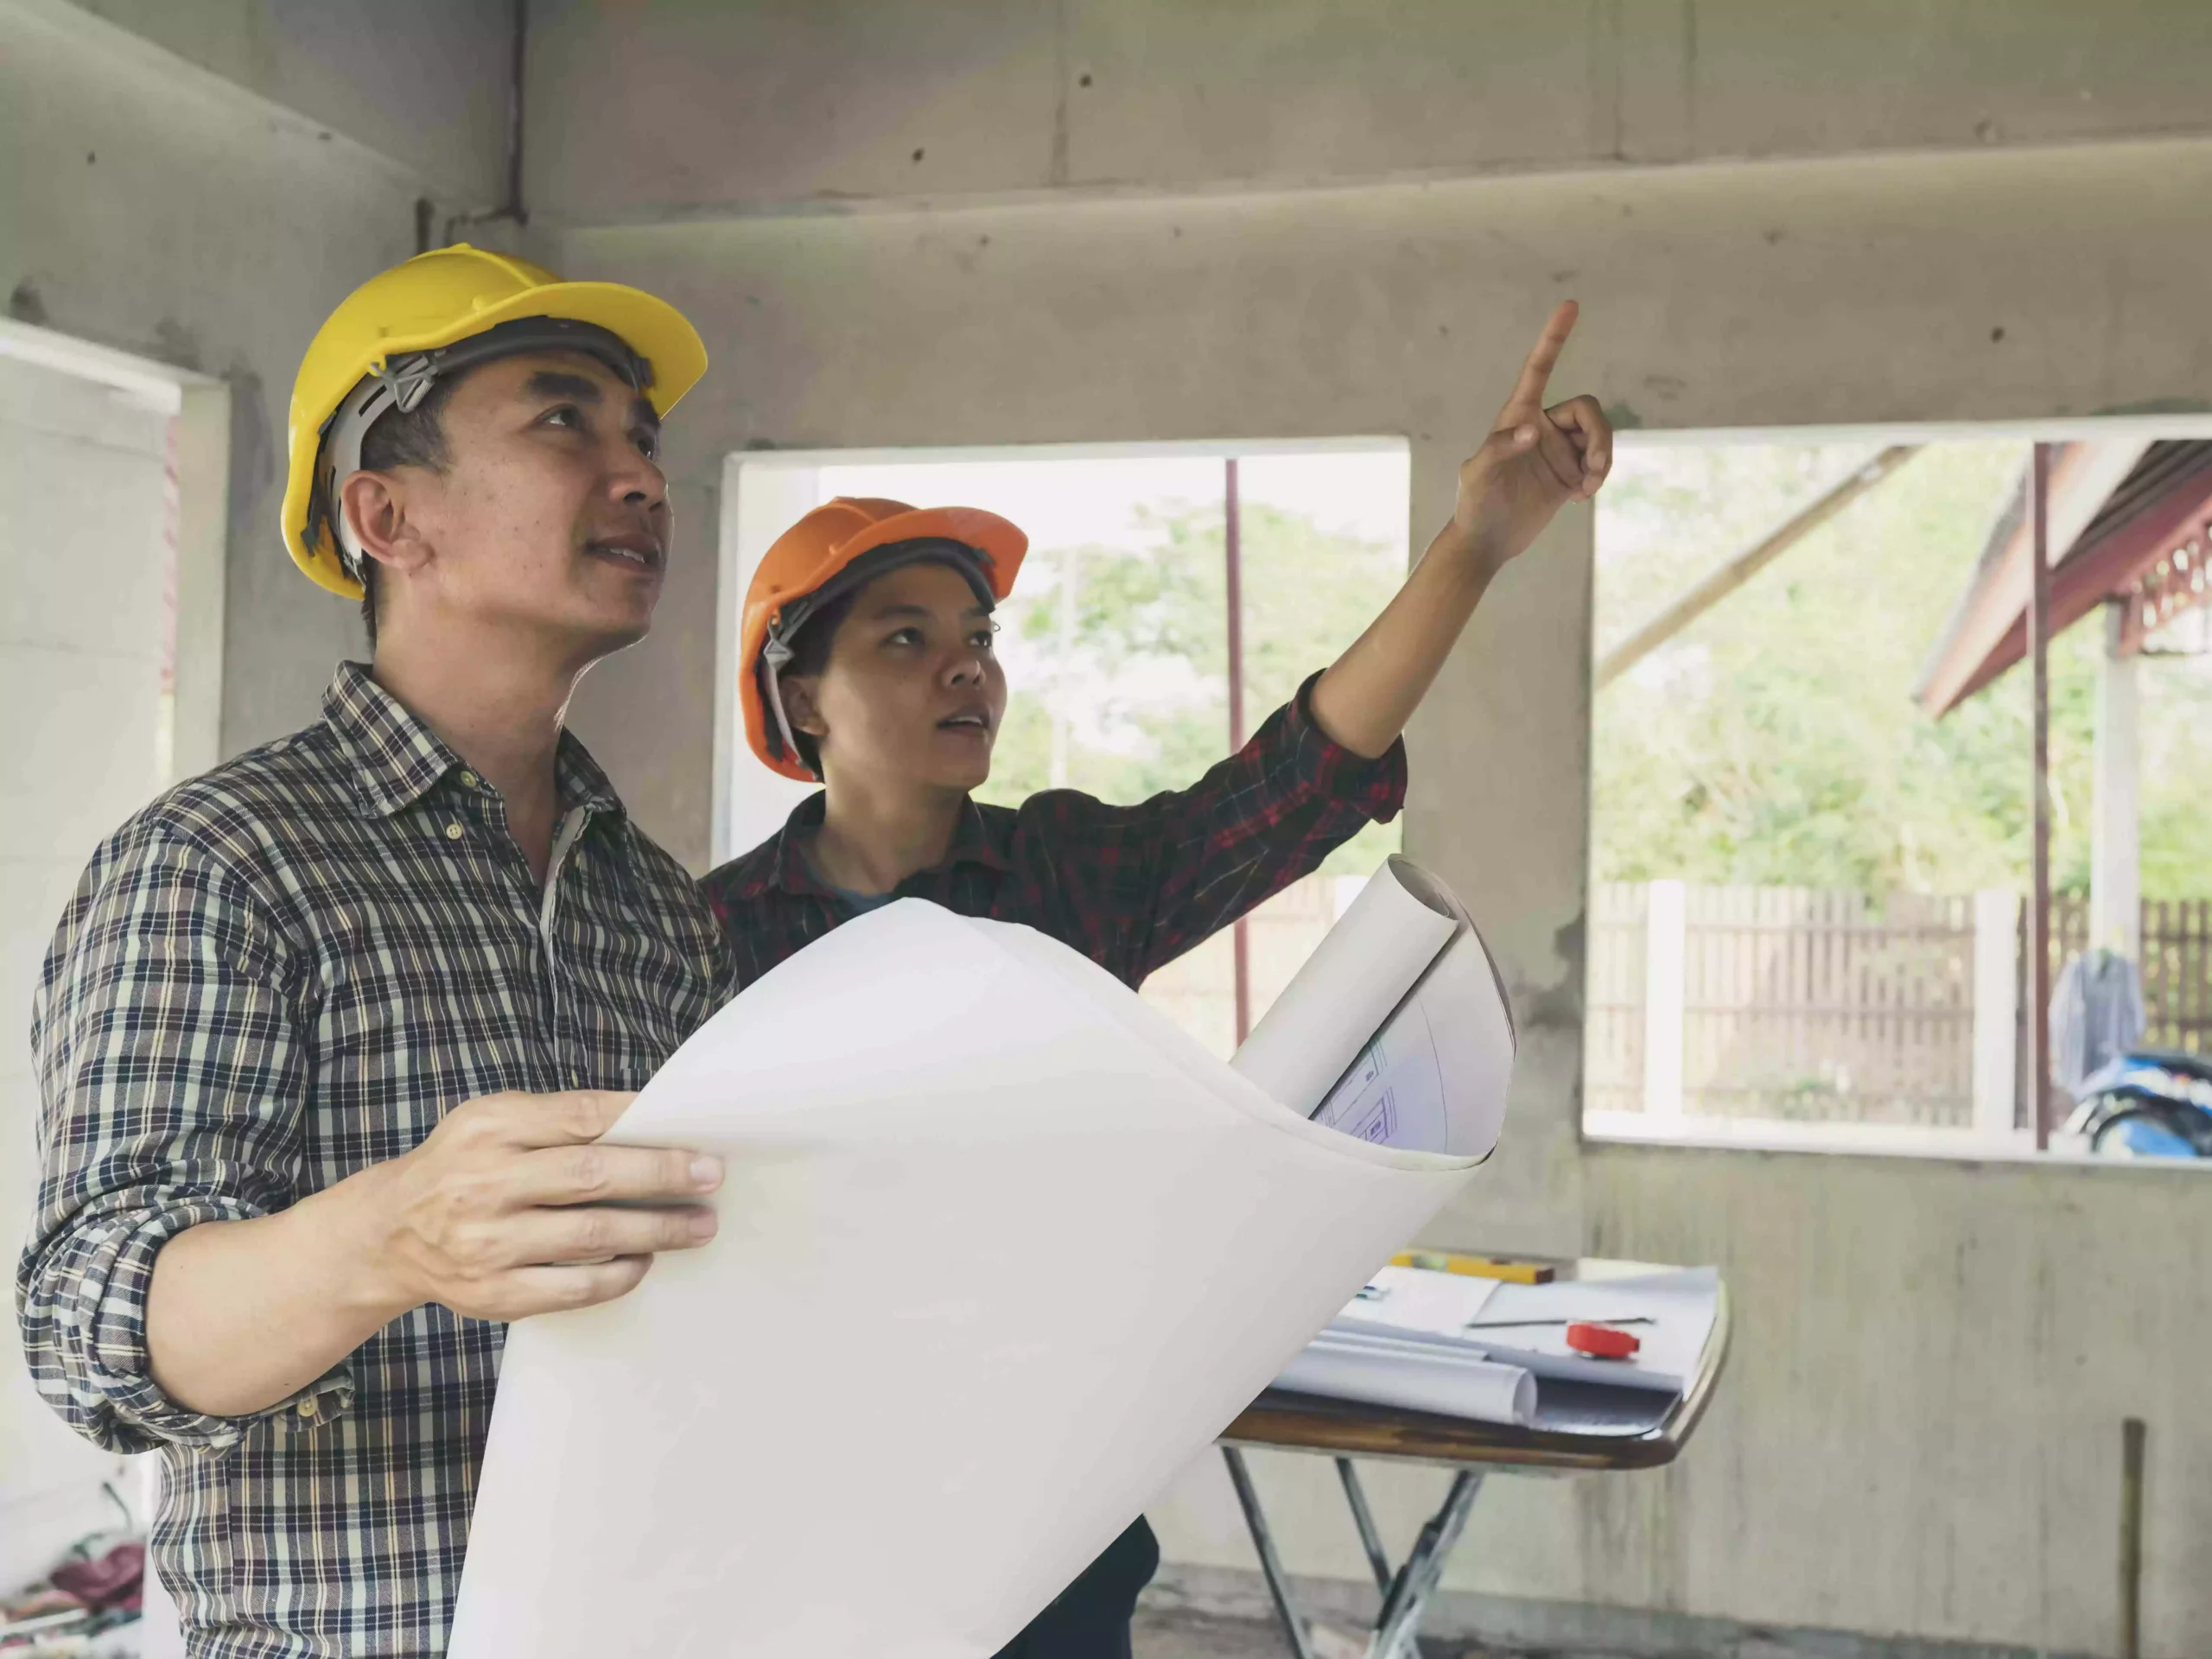
i. Homeowner Interview
The whole-house customization process begins with a deep dive into your lifestyle, preferences, and expectations. An expert from the whole-house customization solutions company usually conducts this interview.
You need to discuss your daily routines, family size, hobbies, and future plans with them. They might also ask you a few questions. For example, do you work from home? Do you entertain often? Do you need extra storage, specialized furniture, or special rooms like a gym or media room?
The expert listens carefully and takes notes. This interview sets the foundation for the entire project. It ensures the design will truly reflect your needs and personality.
ii. Expert Guidance
You might not know all the technical details or what’s possible. That’s where expert guidance comes in. The expert explains different options based on your interview.
Their job is to translate your vision into a buildable plan. They’ll help you prioritize features and make informed choices. This guidance keeps your project realistic and aligned with your goals.
If you’re looking for an expert one-stop whole-house customization solution, look no further than George Group. With us, you get direct-from-factory pricing, ISO-certified quality, and a dedicated support team guiding you from design to delivery. We handle everything from consultation, materials, manufacturing, shipping, installation, to after-sales service. So, you can enjoy a hassle-free experience with significant time and cost savings.
iii. Document Requirements
After gathering all your input, the construction team documents everything. This includes your wish list, lifestyle notes, and any special requirements, such as integration of smart appliances within the customized home. These documents form the blueprint for the next phases. It also helps manage expectations and avoid costly changes down the line.

2. Pre-Design Phase
This next step determines whether or not your requirements can be met in the given space, time, and budget. If not, they might need to be adjusted slightly.
i. Site Measurements and Analysis
Once your needs are clear, the construction team visits your property. They take precise measurements of the land and existing structures. This includes length, width, elevation, and topography. They also analyze sunlight patterns, wind direction, and drainage.
This data helps determine how your home will sit on the land. For example, positioning rooms to maximize natural light or avoid harsh winds can improve comfort and reduce energy costs.
They also check for any site challenges like rocky soil, trees, or access limitations. This thorough site analysis ensures your home will be safe, comfortable, and efficient.
ii. Feasibility Report
After the site analysis, you receive a feasibility report. This document assesses whether your ideas can work on your property. The report highlights any potential roadblocks, like height restrictions or setback requirements. It also suggests possible solutions or alternatives.
It provides a clear picture of what’s possible, helping you refine your vision early. You’ll feel more confident moving forward knowing your project is feasible.
3. Design and Planning
Before any material is procured and actual construction begins, a solid design is prepared. This design serves as a blueprint for the entire whole-house customization process.
i. Concept Development
With site data and your needs in hand, designers start sketching concepts. They create initial floor plans and layouts that show room sizes, flow, and relationships. This phase is highly collaborative. You’ll review sketches and provide feedback. Designers adjust the plans accordingly.
They also consider structural elements like load-bearing walls and plumbing routes. The goal is to create a design for whole-house customization that balances desires with practical requirements.
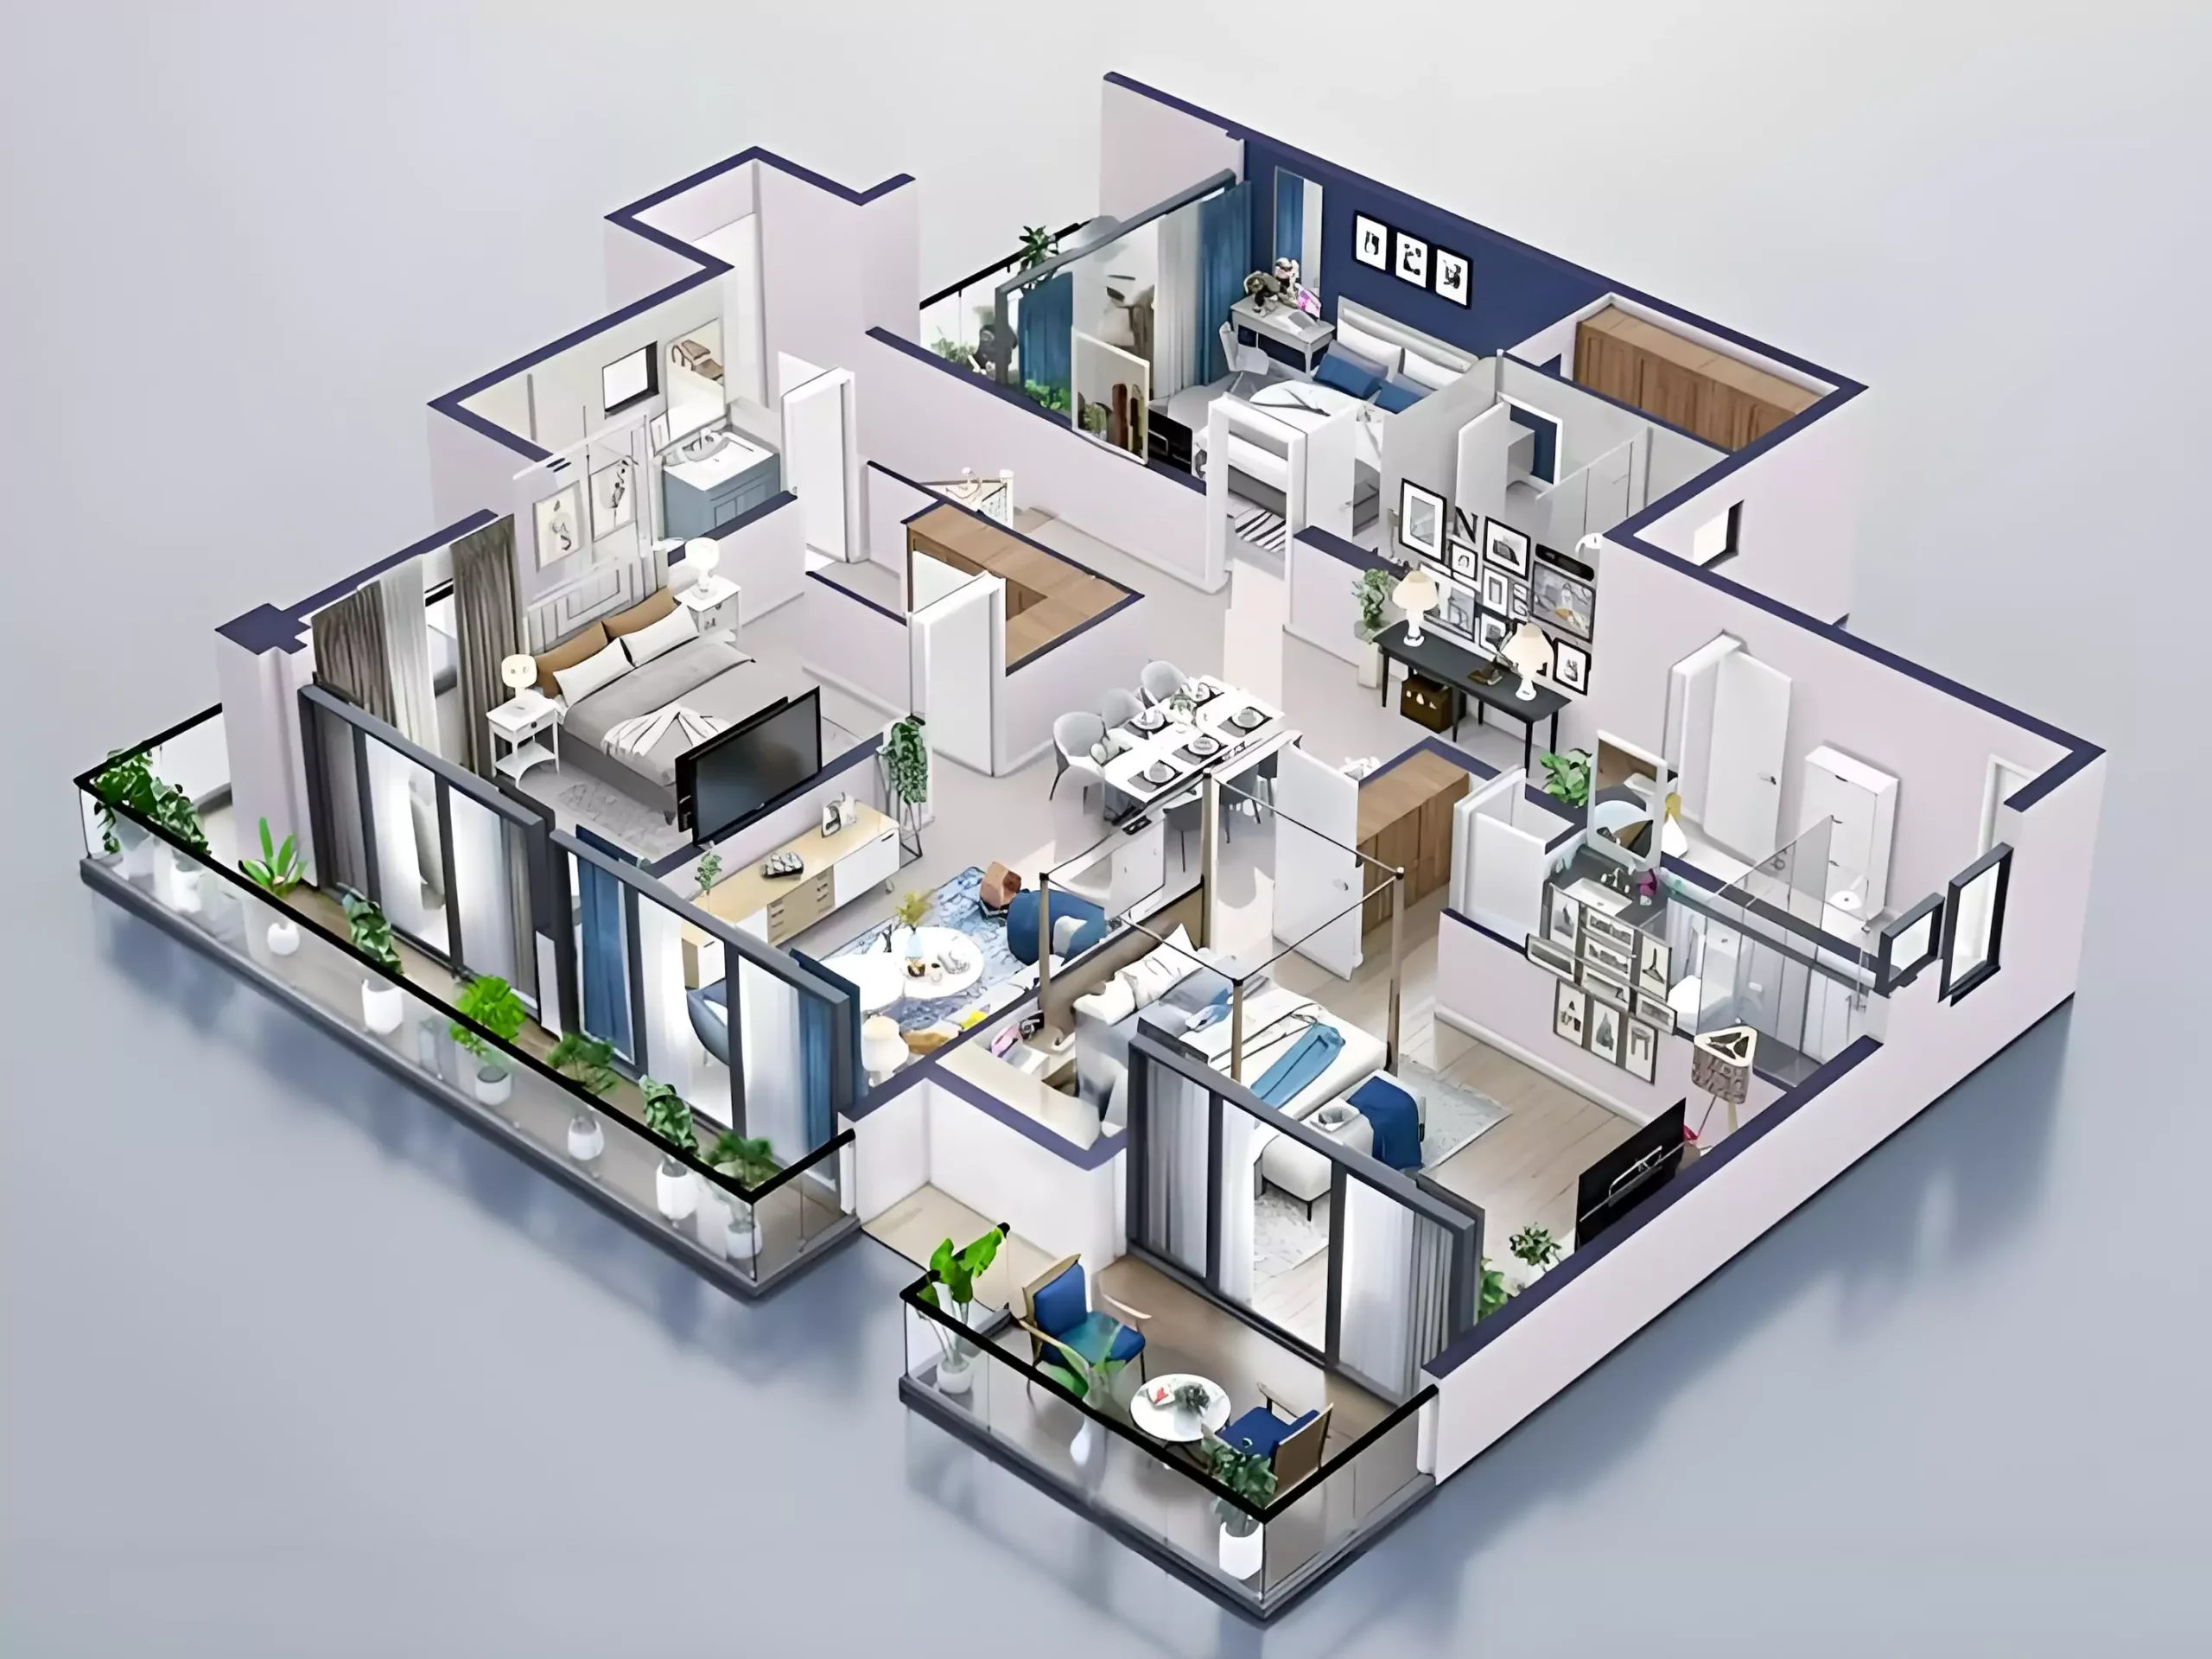
ii. 3D Visualization
Concept sketches are great, but 3D visualization is what brings your home to life. Using 3D mapping software, designers create detailed 3D models of your home. You can see the exterior and interior from multiple angles. This helps you understand spatial relationships and aesthetics.
This way, it’s easier to spot design flaws or areas that feel cramped. This 3D visualization empowers you to make confident decisions before construction begins.
iii. Virtual Walkthrough
Taking 3D a step further, virtual walkthroughs let you “walk” through your home digitally. You can move from room to room, open doors, and look out windows. This immersive experience helps you feel the space and flow. You can assess how natural light enters rooms at different times of day. It also helps you imagine living in the home.
iv. Design Finalization
After multiple rounds of feedback, the design is finalized. This means all floor plans, elevations, and details are locked in. The team prepares detailed construction drawings and specifications. You’ll review everything thoroughly to ensure it matches your vision. This is your last chance to make changes without impacting the budget or schedule.
v. Construction Timeline
Next, you receive a detailed construction timeline. This schedule breaks down the entire build into phases with start and end dates. The timeline helps you plan your life around the build. You’ll know when major milestones happen and when to expect progress updates. It efficiently utilizes time and ensures that there are no gaps or time lost.
This is a very important reason why you should opt for a one-stop whole-house customization solution. When you work with a single, integrated team from design to construction, you avoid delays. This means quicker decisions, smoother workflows, and fewer costly mistakes.
vi. Client Approval
Before the next steps of the construction commence, you must approve all plans, materials, and the timeline. This formal sign-off ensures you agree with every aspect of the project.
4. Material and Finish Selection
In light of the approved design, appropriate materials are selected for the construction. Upon approval, these materials are sourced in required quantities.
i. Material Selection
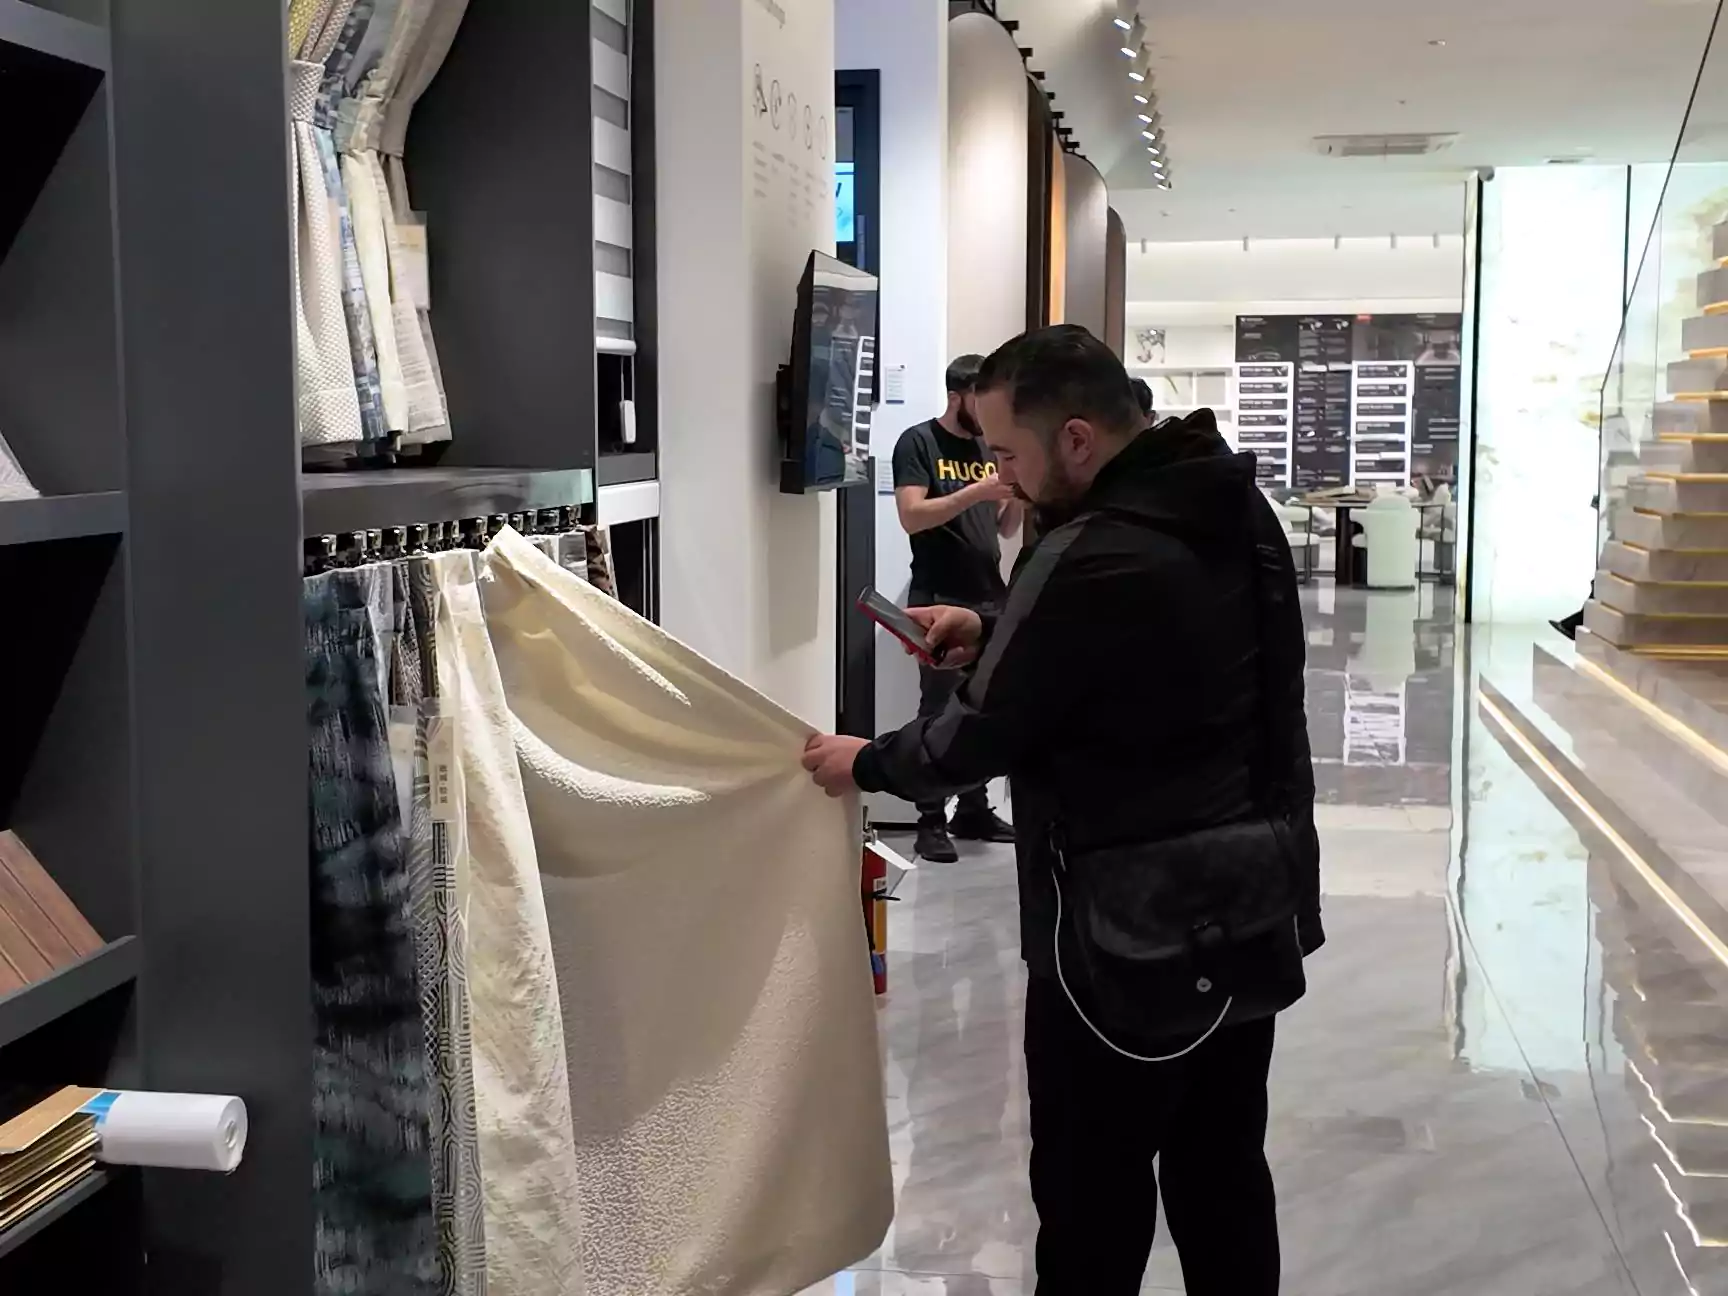
In this exciting step, you choose the materials that will be used in your house. You select everything from flooring and wall finishes to kitchen countertops and cabinetry. The designer presents options that fit your style and budget. You also consider maintenance and longevity.
The team explains the pros and cons of each choice. This step lets you personalize your home’s look and feel down to the smallest details.
ii. Sampling and Approval
In this step, you get to order the real samples to touch and compare. This helps you see the true texture, colors, and surface finishes. Sampling prevents costly mistakes by ensuring you are confident in every choice. You approve the final selections before procurement begins.
iii. Material Procurement
Once you approve materials, the procurement team, with the whole-house customization company, orders everything. They coordinate with trusted suppliers to secure quality products on time. They track shipments and manage delivery schedules to align with construction phases.
5. Customized Manufacturing
This is where the actual construction process begins. The purpose of this construction is to create modular assemblies that meet all the requirements and design criteria.
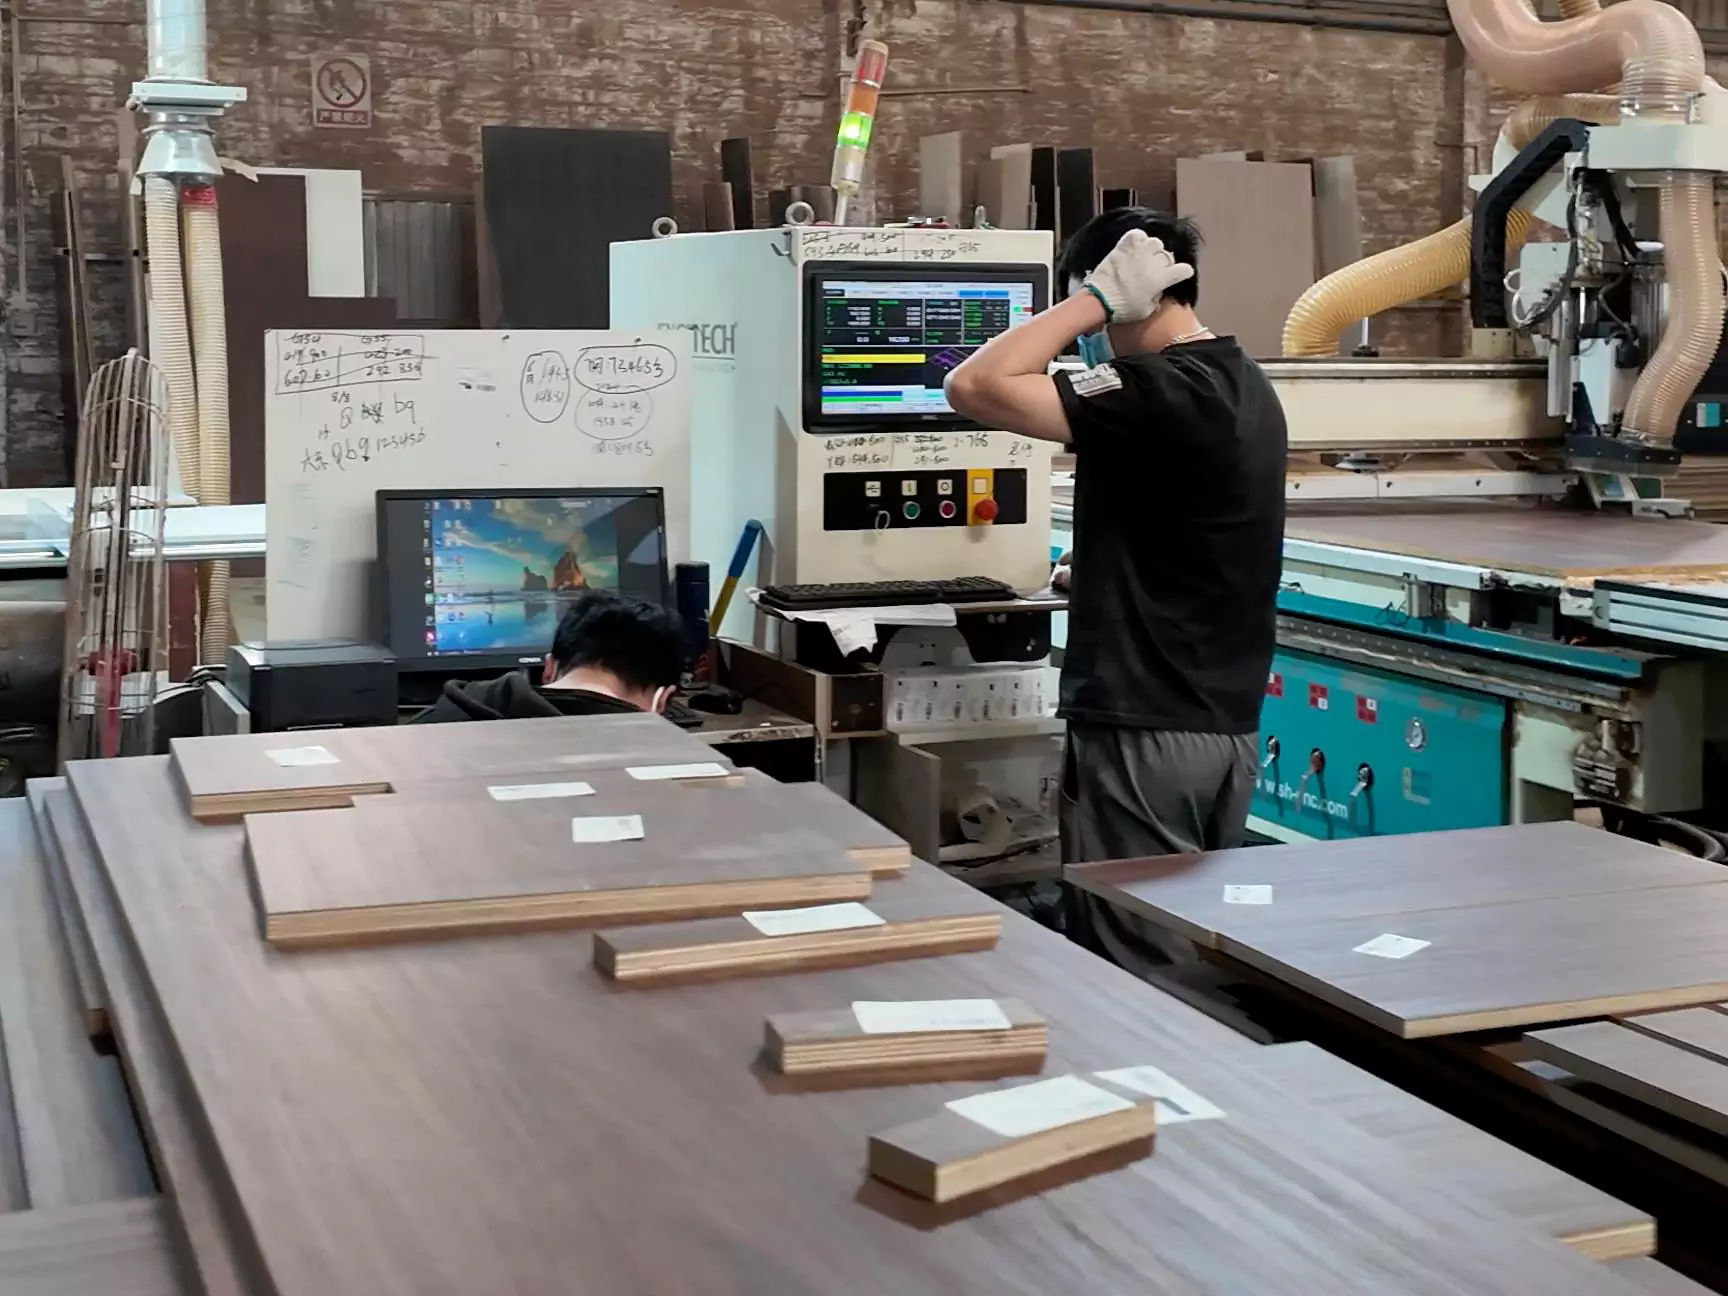
i. Precision Production
Custom elements like cabinetry, built-ins, and specialty windows are produced with precision. Skilled craftsmen use your exact measurements and specifications, and every piece is tailored to fit your home perfectly. Advanced tools and CNC machines are used for precision production to ensure accuracy. This level of detail enhances quality and fit, reducing installation issues.
ii. Modular Assembly
Most components are built as modules in a controlled factory environment. This method improves quality control and speeds up construction. Modules are usually pre-assembled sections like bathroom pods or kitchen units. Modular assembly protects materials from weather damage and allows simultaneous work on-site and off-site. It also reduces waste and on-site disruption.
iii. Surface Finishing
Once the production of individual elements and modular assemblies is complete, final surface treatments are applied. This includes painting, staining, or sealing. Finishes are applied evenly and cured under ideal conditions. This ensures durability and a flawless look. The finishing process also includes hardware installation, like hinges and drawer slides.
iv. In-House Quality Check
Before shipping, every module undergoes a rigorous quality check. Dimensions, finishes, and hardware function are verified. Only perfect modules are approved for delivery.
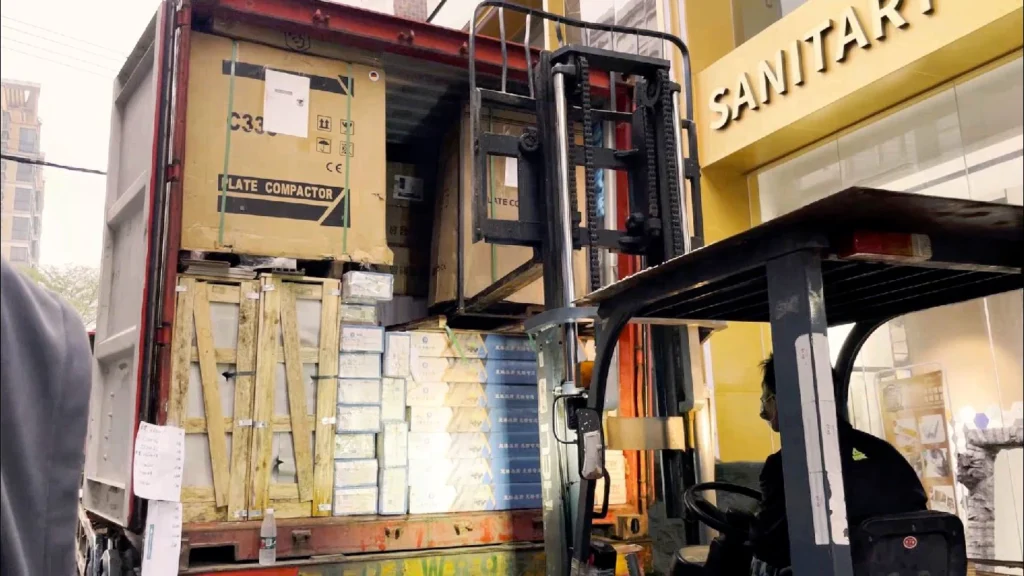
6. Logistics and Shipping
The next step is to pack, ship, and deliver the house modular assemblies along with the hardware. It is a very critical step as all the materials need to be shipped safely and efficiently.
i. Module Packaging
Proper packaging is vital to maintain the quality of the construction. Therefore, modules are carefully packaged to prevent damage during transport.
Protective padding, shrink wrap, and custom crates shield surfaces and corners. Finally, each package is clearly labeled with contents and installation instructions.
ii. Module Shipping and Transport
Modules are transported via a combination of sea and land routes to your site. The logistics team plans the best routes to avoid delays and damage. For imported products, customs import and duties are also considered and anticipated in advance.
In addition to that, the logistics team coordinates timing to align with site readiness. You receive tracking updates so you know when shipments arrive.
iii. On-Site Storage
Upon arrival, modules are stored on-site. Covered storage and security measures protect them from weather and theft. It also ensures that modules remain in pristine condition until installation.
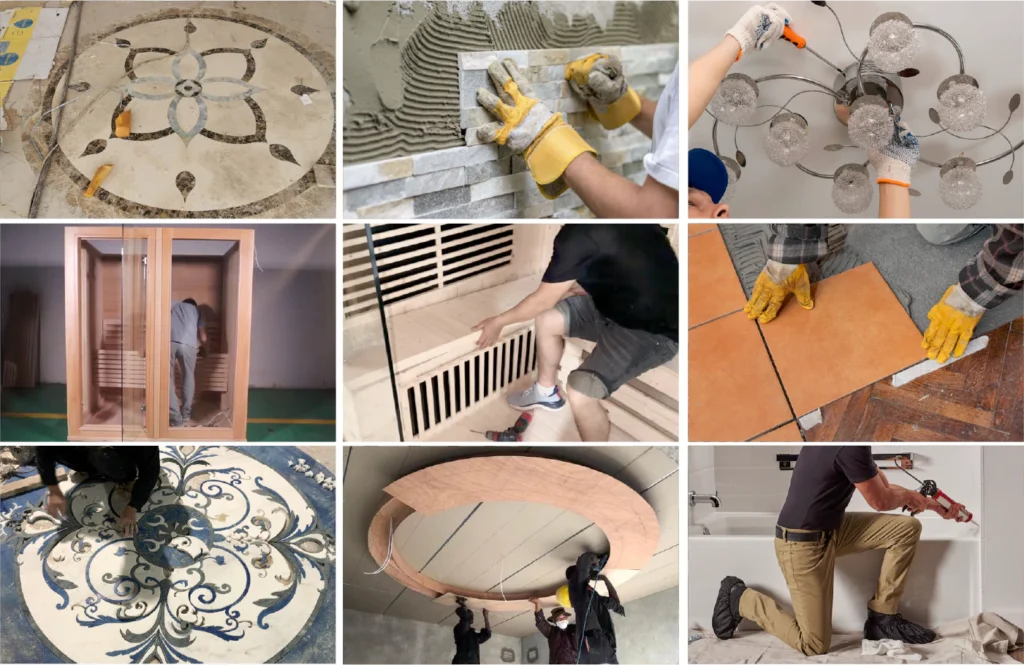
7. On-Site Installation
Installation is the step where your home starts coming together. Each assembly is erected one by one, and hardware is installed piece by piece.
i. Site Preparation
Like any other construction project, even with the whole-house customization, the first step is to prepare the site. The foundation is poured and cured. Utilities like water, electricity, and sewage are connected. Finally, the area is cleared and leveled for construction activities.
ii. Module Installation
In this step, pre-fabricated and pre-assembled modules are lifted and installed into their place using cranes or heavy lifts. Next up, each section and module is secured with bolts and welds. Depending upon the resource allocation and project size, your home starts taking shape in a few hours to days.
iii. Alignment and Adjustment
After the placement of modules, the construction team ensures that the modules align perfectly. Walls, floors, and furnishing materials, such as ceilings, are adjusted so everything fits seamlessly. The purpose of this alignment and adjustment is to prevent gaps, leaks, or structural issues.
iv. Hardware Installation
Next, hardware like door handles, locks, faucets, and light fixtures are installed. The construction team tests each item to ensure proper function.
v. Final Touchup
The crew performs final touchups, including paint corrections and caulking. They remove any marks or debris from the installation. This attention to detail gives a flawless look to your house.
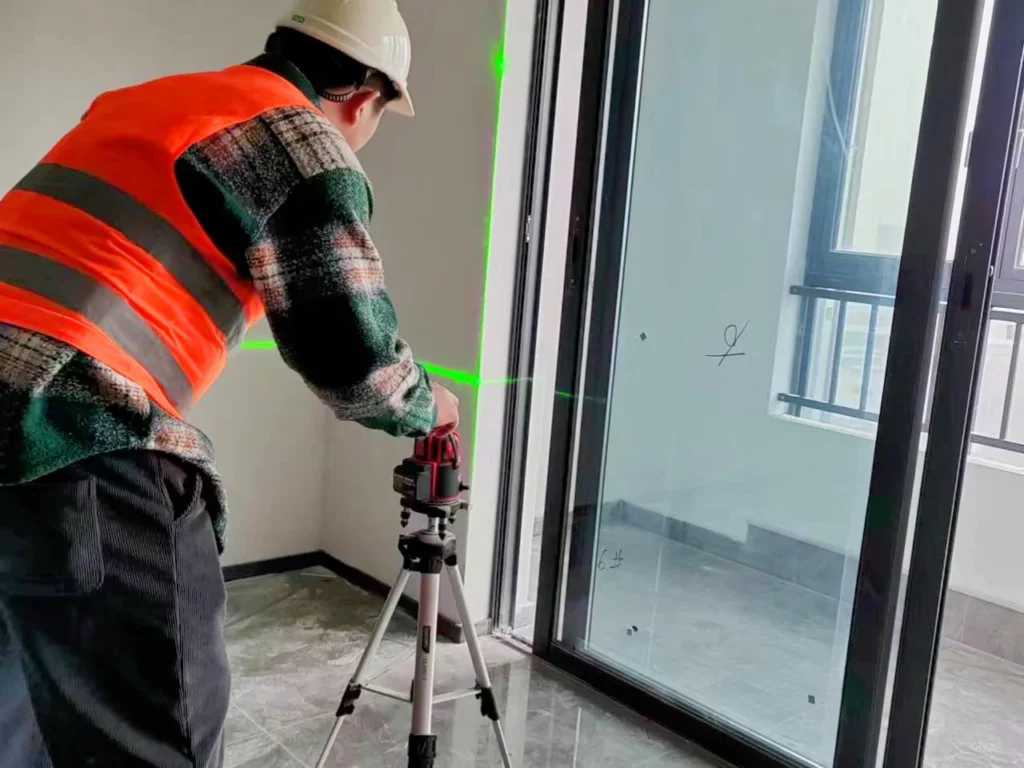
8. Final Quality Inspection
Before your customized house is ready for delivery, it needs to be tested properly. This step ensures that your house is functional in all aspects and complies with the applicable standards.
i. Dimensional Accuracy Check
This is the first step of the final quality inspection. Quality inspectors measure every room and opening to confirm they match the plans. This includes doorways, windows, and ceiling heights. Any discrepancies are noted down in a punch list.
ii. Functional Testing
Next up, all the systems and working components of the house undergo functional testing. As a part of this testing, plumbing fixtures are checked for leaks, electrical outlets are checked for power, and HVAC systems are checked for airflow. Similarly, the doors and windows are tested for smooth operation and security.
iii. Compliance Verification
A very important aspect of the whole-house customization is that your house still must meet local building codes and safety standards. Therefore, after the testing is complete, Quality inspectors verify compliance with fire regulations, structural integrity, and accessibility. It is ensured that your house follows all the regulations and standards before occupancy.
iv. Finish Quality Inspection
A final quality inspection is planned for the end. The purpose of this inspection is to focus on the overall aesthetics of the house. Surfaces are examined for smoothness, color consistency, and overall finish quality. Any imperfections are addressed promptly before handover.
9. Final Modifications and Delivery
Finally, you get to walk into your dream home. You give your feedback and point out any changes required. You get your final project delivered after everything is completed.
i. Client Walkthrough
At this stage, you are allowed to tour your new home. This walkthrough lets you inspect every detail up close. You can ask questions and discuss any concerns regarding construction with the construction team. It’s your moment to ensure the home matches your expectations.
ii. Issue Rectification
You need to watch out for any issues. This could be a scratch, a misaligned cabinet, or a paint touch-up. If you find issues, the team fixes them promptly. The goal is 100% satisfaction.
However, please note that the construction team reserves the right not to incorporate any feedback that wasn’t a part of the initial plans. It is done to prevent delays and budget overruns.
iii. Clean-Up
After you’ve approved of everything, the site is thoroughly cleaned. Dust, debris, and construction materials are removed. Your home is made to appear spotless and ready for move-in.
iv. Punchlist Review
You, along with the construction manager, review a punch list that was created during the final inspection phases. It is basically a checklist of final tasks and fixes. Every item on this list must be completed before project closure.
v. Project Delivery
Finally, your custom home is ready, and you are handed over the keys to your new house. You move in knowing every detail was crafted just for you.
Still, if any issues arise after the construction, companies like the George Group provide a comprehensive warranty service, ensuring worry-free after-sales support for all installation services and building materials.

Final Word: Complete Process of Whole-House Customization
Customizing your entire home is an exciting journey. It’s about creating a space that fits your lifestyle and needs perfectly. But it’s also a complex process. Therefore, you need to understand every step to make the best decisions. This guide breaks down the entire process from the first conversation to the final delivery. The process is detailed, but the results are worth every step.
At George Group, we offer end-to-end whole-house customization. We provide 12+ house building material categories where every product is ISO-certified. With clients in 130+ countries and over 30,000 projects delivered, you can be sure of getting what you asked for.
Contact us today to learn more about how we can help you create the home of your dreams! We are here to make your vision a reality.
For more information on sourcing building materials and customized solutions from China, you can visit our blog section.
